Content Structure and Reuse
Learn how to structure books, create topics, and reuse content. This section will cover assembling a book, organizing content hierarchy, and referencing reusable objects.
Before beginning, please ensure users have access to an Author-it Library and appropriate permissions to create books and topics.
1. Create New Book For Publication
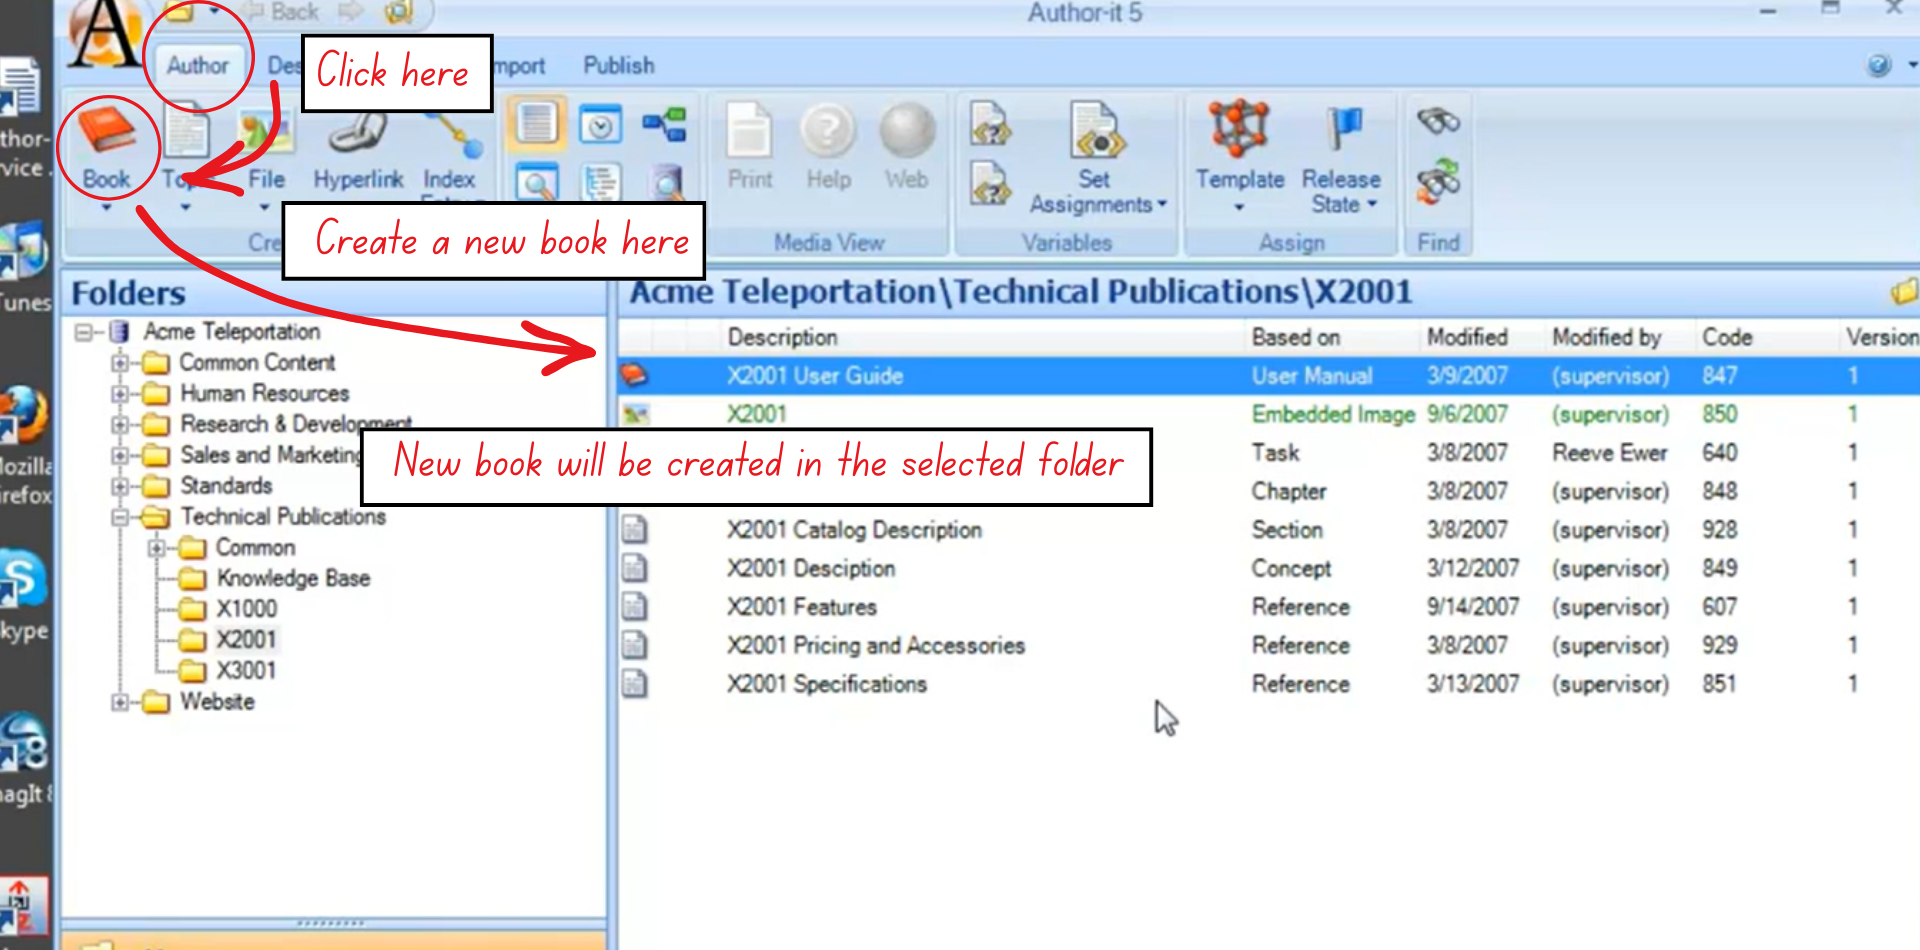
Figure 7: A visual guide to create a new book
- Go to the Author ribbon and create a new Book using an appropriate Book Template (e.g., User Manual).
- Review any default objects the template may add automatically.
- Save the Book in the appropriate working folder.
A Book Object acts as the publication container. It determines structure, sequence, and output settings. It does not store content, only references it.
2. Add Content To Books
- In the Book's contents area, use drag-and-drop to add:
- Topic objects
- Graphic/File objects
- Other Book objects (for bundles or reusable packages)
- Add objects from any folder or from search results.
- Save the Book after assembling the components.
Dragging one Book inside another helps you reuse structured sections across multiple deliverables.
3. Define Object Sequence
- Select an object inside the Book.
- Use drag-and-drop, or the Up/Down arrows to rearrange order.
- Confirm that the sequence reflects the expected reading flow of the published output.
Why this matters?
The sequence directly controls the order of content in the published document.
4. Set Object Hierarchy Levels
- Select an object inside the Book.
- Use the Promote (left arrow) or Demote (right arrow) options to assign heading levels.
- Verify:
- Level 1 → Heading 1
- Level 2 → Heading 2
- Level 3 → Heading 3, etc
Impact:
- The TOC structure mirrors the assigned hierarchy.
- The hierarchy enables true single-sourcing because a topic can adapt its heading level depending on where it’s reused.
5. Create New Topics
Creating Topic objects can be done in two ways:
Option A - Create from the Author Ribbon
- Open the folder where the new Topic should be stored.
- Choose Author → Topic, select a template, and save it.
- Drag the Topic into your Book.
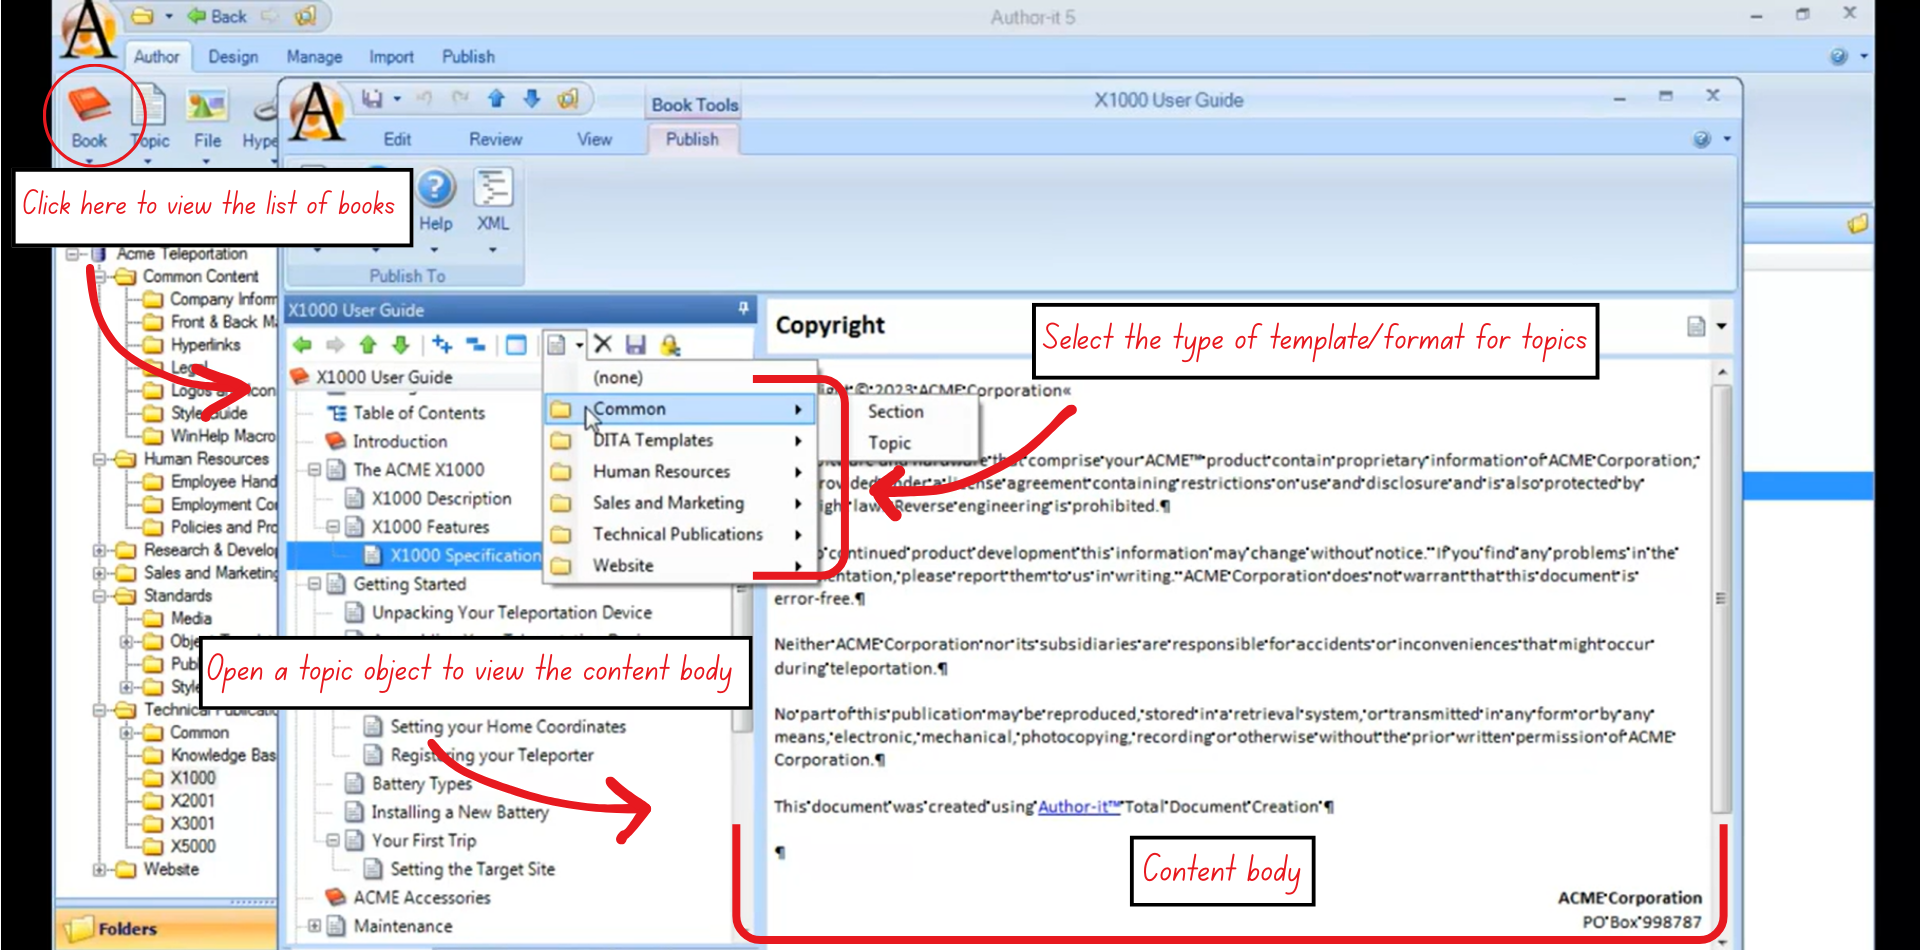
Figure 8: Internal view of book and its topic-based features
Option B (Recommended) - Create from inside the Book
- Open a Book in the Book Editor view.
- Select the object that should precede the new Topic.
- Click New Topic in the Book toolbar.
- The Topic is created directly in the Book and saved in the currently selected folder.
Why this is better?
It eliminates the risk of creating a Topic but forgetting to insert it into the Book.
6. Reuse Existing Objects
- When needing a Topic, Graphic, or Book that already exists, drag it into the new Book instead of copying.
- Edit the object from any location if needed - changes automatically update everywhere it's reused.
Key idea:
A Book only references objects. The object’s “home folder” location does not affect its use in any Book.
7. Results
- A Book is structured with the correct order and hierarchy.
- Topics are small, reusable, and referenced from their home folder.
- Content reuse is enabled across multiple publications without duplication.
8. Best Practices
- Keep topics small (1–2 paragraphs) for maximum reusability.
- If a problem arises with the new heading or subheading, create a new Topic instead of making a long object.
- Add graphics, tables, and hyperlinks as needed.
Important:
Author-it is not WYSIWYG. A Topic may not look like the final output. Styles and layout are applied only during publishing.
9. Additional Notes
- Moving a Topic between folders does not break its relationship inside a Book.
- Changing a Topic that is reused across multiple books affects all books.
- Single-sourcing and reference-based assembly form the core of Author-it’s reuse model.